The Inspector
The inspector is a tool that can be used to examine RayTK operators. The inspector provides a way to “look inside” an OP.
Because the ROPs are not a natively supported part of TouchDesigner, they don’t have inline previews like TOPs, SOPs, etc. The inspector is intended as an alternative, and adds other toolkit-specific features.
![]() The TDRaymarchToolkit which was the inspiration for RayTK does support inline previews. It does so by embedding a renderer inside each OP. While great from a user perspective, it can be very costly in terms of performance. Because of the performance and other issues, RayTK made the decision to abandon support for inline previews.
The TDRaymarchToolkit which was the inspiration for RayTK does support inline previews. It does so by embedding a renderer inside each OP. While great from a user perspective, it can be very costly in terms of performance. Because of the performance and other issues, RayTK made the decision to abandon support for inline previews.
How to Open the Inspector
All ROPs have a parameter named “Inspect”. Clicking on this parameter will open up an inspector window, pointed at that ROP. Inspecting another ROP will reuse that same window. It is not currently possible to have multiple inspectors.
![]() Upcoming versions to the toolkit will likely provide other ways to launch the inspector, such as with a keyboard shortcut.
Upcoming versions to the toolkit will likely provide other ways to launch the inspector, such as with a keyboard shortcut.
The Inspector UI
The inspector window is arranged into several sections:
- Info bar - At the top of the window, the info bar shows properties of the selected ROP. Aside from the path, these are mostly only relevant for development purposes.
- Tool bar - Below the info bar, there is a row of buttons to perform various actions, such as showing the selected ROP in the network editor, or resetting the inspector so it deselects the ROP.
- Main panel - The main area of the window is separated into several tabs.
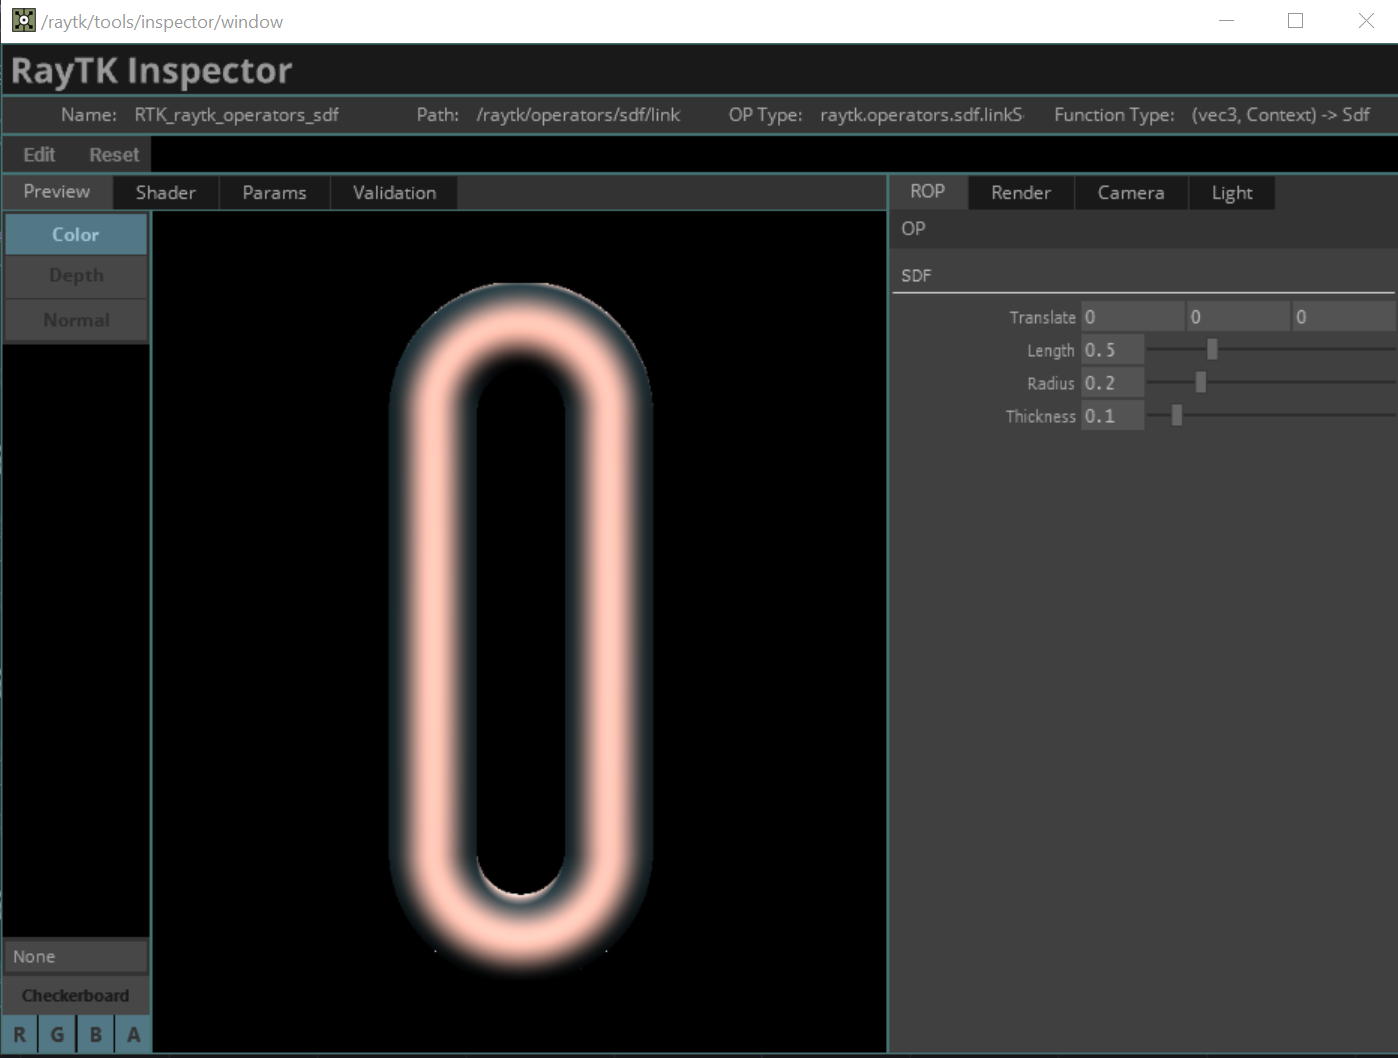
- Preview - Shows a rendered view of the ROP.
- Shader - Shows the full generated shader code.
- Params - Details about all the parameters of the ROP and its dependencies.
- Validation - A table of warnings and errors about the ROP and its dependencies.
- Parameters panel - The parameters panel next to the main panel shows parameter editors for the selected ROP and other components.
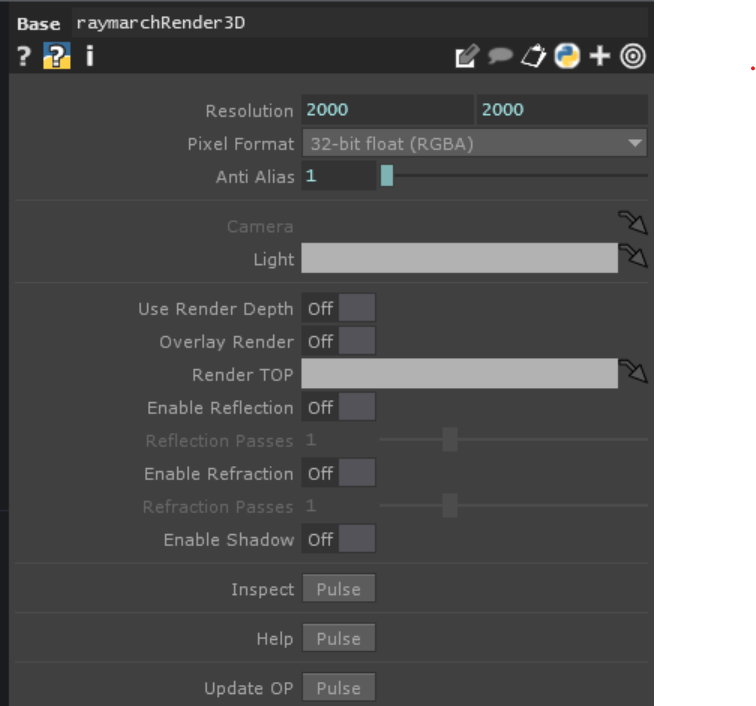
- ROP - The parameters of the selected ROP.
- Render - The parameters of the renderer being used, which is either the selected ROP if it is an OutputOP, or a separate renderer that the inspector created.
- Camera - The parameters of the camera being used. This can be one of several different cameras depending on the selected ROP and related settings.
- Light - The parameters of the light being used, similar to Camera.
Inspecting OutputOPs vs. Other ROPs
When inspecting a ROP that is not an OutputOP, the node itself doesn’t have any kind of built-in visualization, so the inspector uses its own internal preview renderers. When inspecting a non-output, the “Render”, “Camera”, and “Light” tabs in the parameters panel point to those items in the inspector’s own renderer.
When inspecting an OutputOP, the inspector shows the output of that renderer instead of using a preview renderer. The parameters panel will then point to that renderer and the attached components (camera, light, etc).
Preview
The preview tab shows rendered views of the selected ROP.
The side bar shows a list of all the available output buffers, such as color, depth, normals, etc. Which buffers are available depends on how the renderer is configured. At the bottom of the side bar, there are settings related to changing how the buffer is viewed, such as normalizing values to a 0..1 range, only showing certain channels, or showing a transparency grid under the image.
![]() Upcoming versions will have arc-ball mouse control for the camera.
Upcoming versions will have arc-ball mouse control for the camera.
Shader
The shader tab shows the full text of the generated shader, and the compiler results, including any errors or warnings.
If there are errors, the inspector will show a red bar with an error message. Clicking it will open the shader tab, which will show details about the errors.