Getting Started With RayTK
Download the Library
The first step to using RayTK is to download the latest tox file, from the repository.
Note that there are many source files in the repository itself, but these are only needed for development purposes. Feel free to take a look through them if you want, but if you only want to use the library rather than modify it, use the release tox file.
Load the Library
Drag the tox file into the project.
Creating a Network
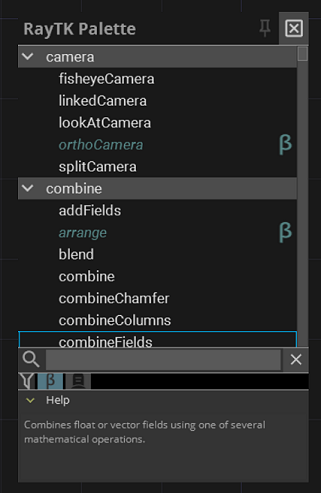
To create your first ROP, use the keyboard shortcut alt + r to open up the RayTK Palette. It will show a list of available ROPs, organized into categories. You can search by typing a name. This popup is like the main TouchDesigner “OP Create Dialog” (using tab), but it shows the available ROPs rather than the standard TouchDesigner OPs.
- Choose a
boxFrameSdf, and a new COMP will be created in the network editor. - Create a
raymarchRender3dand connect the output of yourboxFrameSdfto the input of theraymarchRender3d. - Connect a
Null TOPto the first output ofraymarchRender3d. - Play around with the parameters of the
boxFrameSdf.
You’ve just created your first RayTK network!
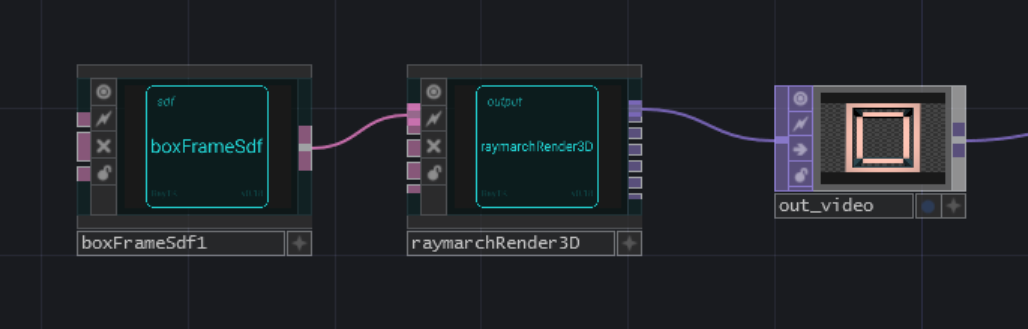
The boxFrameSdf is an SDF (signed distance function) operator, which is how you define geometry. It’s equivalent to SOPs like Sphere, Box, etc.
The raymarchRender3d is an “Output OP” or renderer. It’s equivalent to a Render TOP. It generates and runs a shader that renders the scene.
Camera and Light
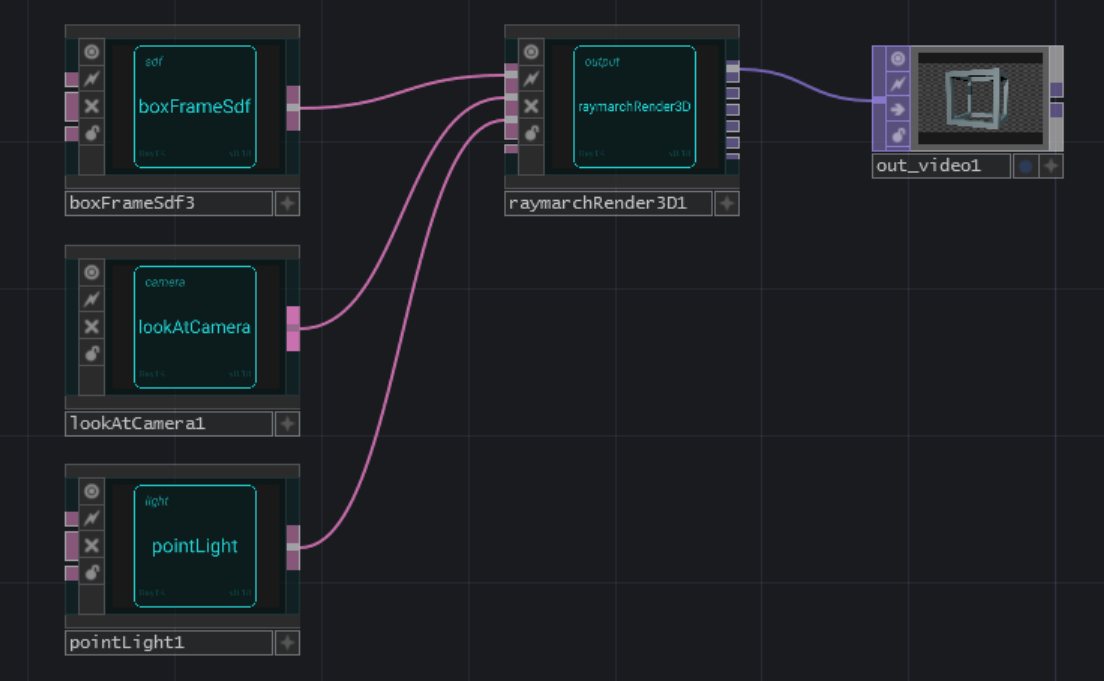
By default, the renderer uses a built-in camera and light. To override those, attach camera and light operators.
- Create a
lookAtCameraand connect it to the second (“Camera”) input of theraymarchRender3d. - Create a
pointLightand connect it to the third (“Light”) input of theraymarchRender3d. - Try changing the settings of the
lookAtCameraandpointLight.
Filters
Now that you have a complete render setup, you can use filters to modify the SDF.
- Add a
twistbetween theboxFrameSdfand theraymarchRender3d. - Adjust the “Amount” parameter and watch the box twist in the output.
- Try changing the “Axis” parameter to twist around another axis.
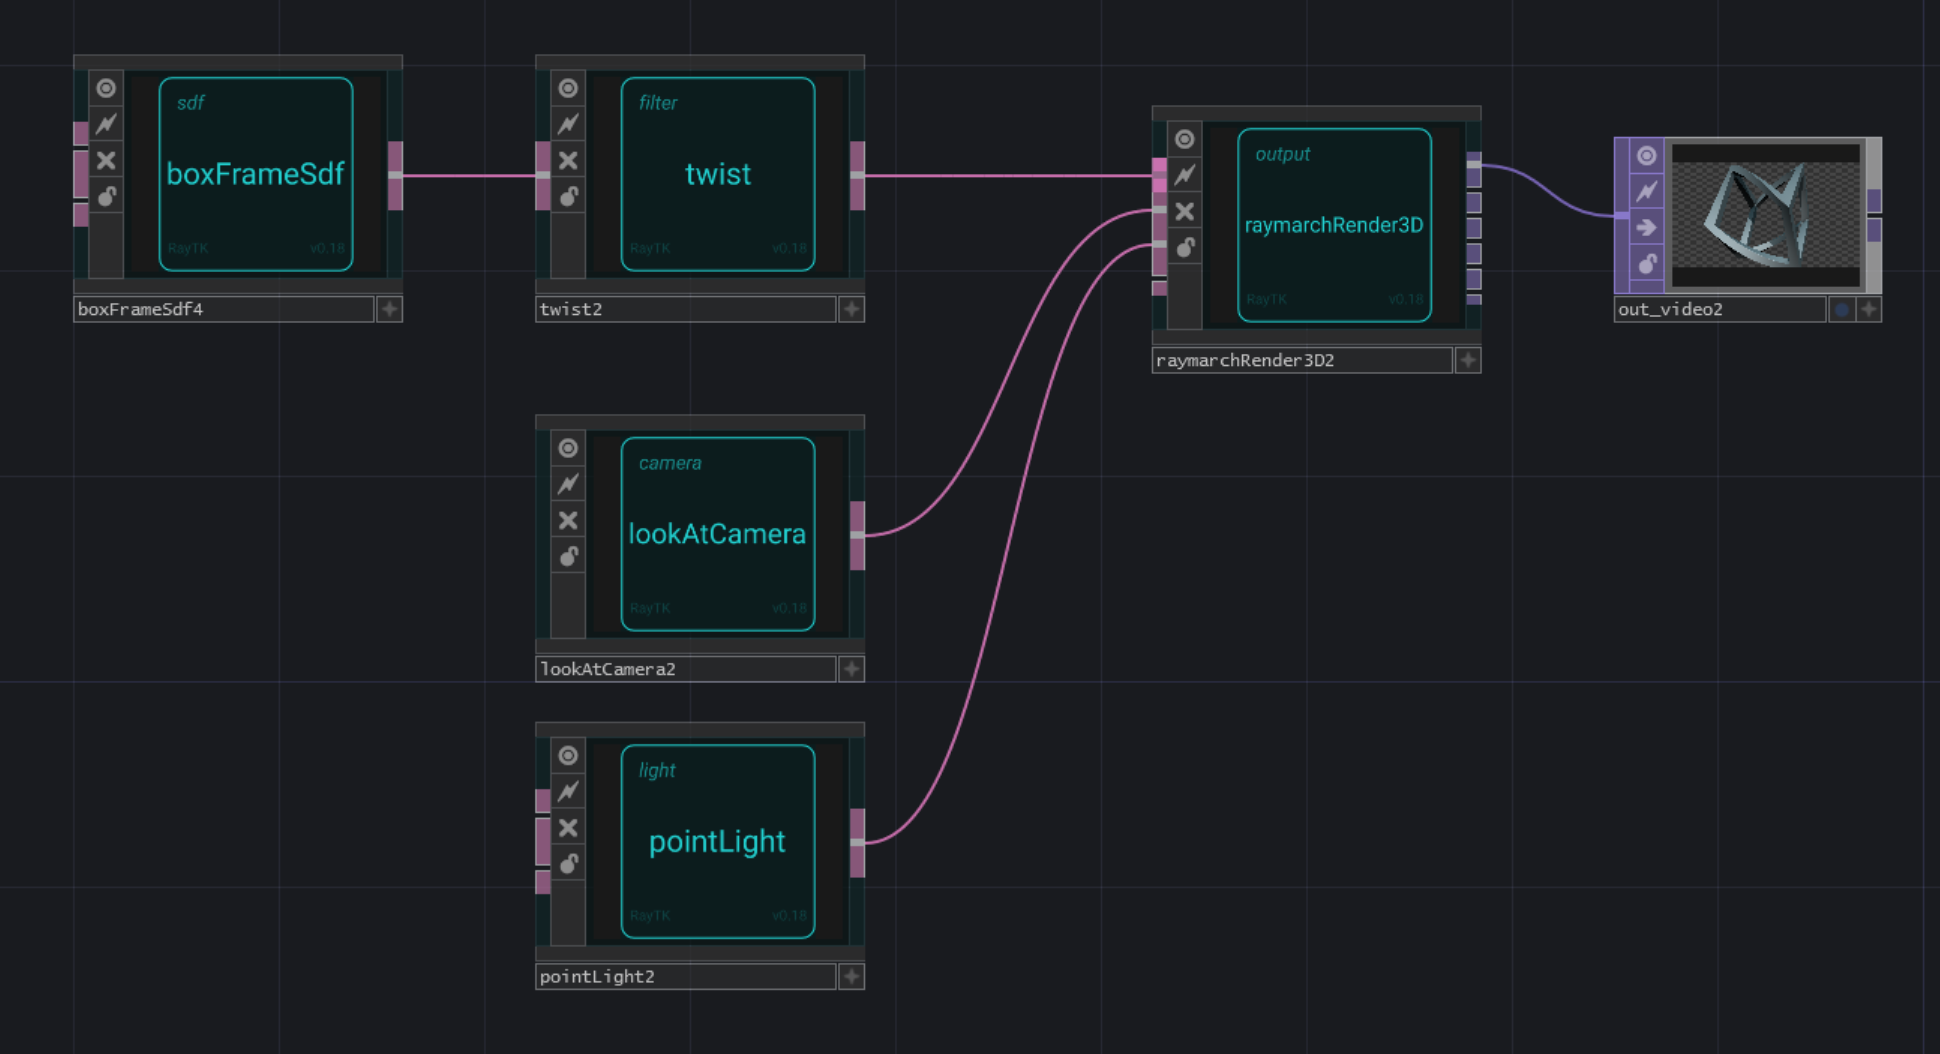
You’ve just created your first “filter” ROP! It modifies the behavior of another ROP.
Materials
By default, the renderer uses a built-in material. To override it, insert a material operator.
- Add a
basicMatbetween thetwistand theraymarchRender3d. - Try out different color settings.
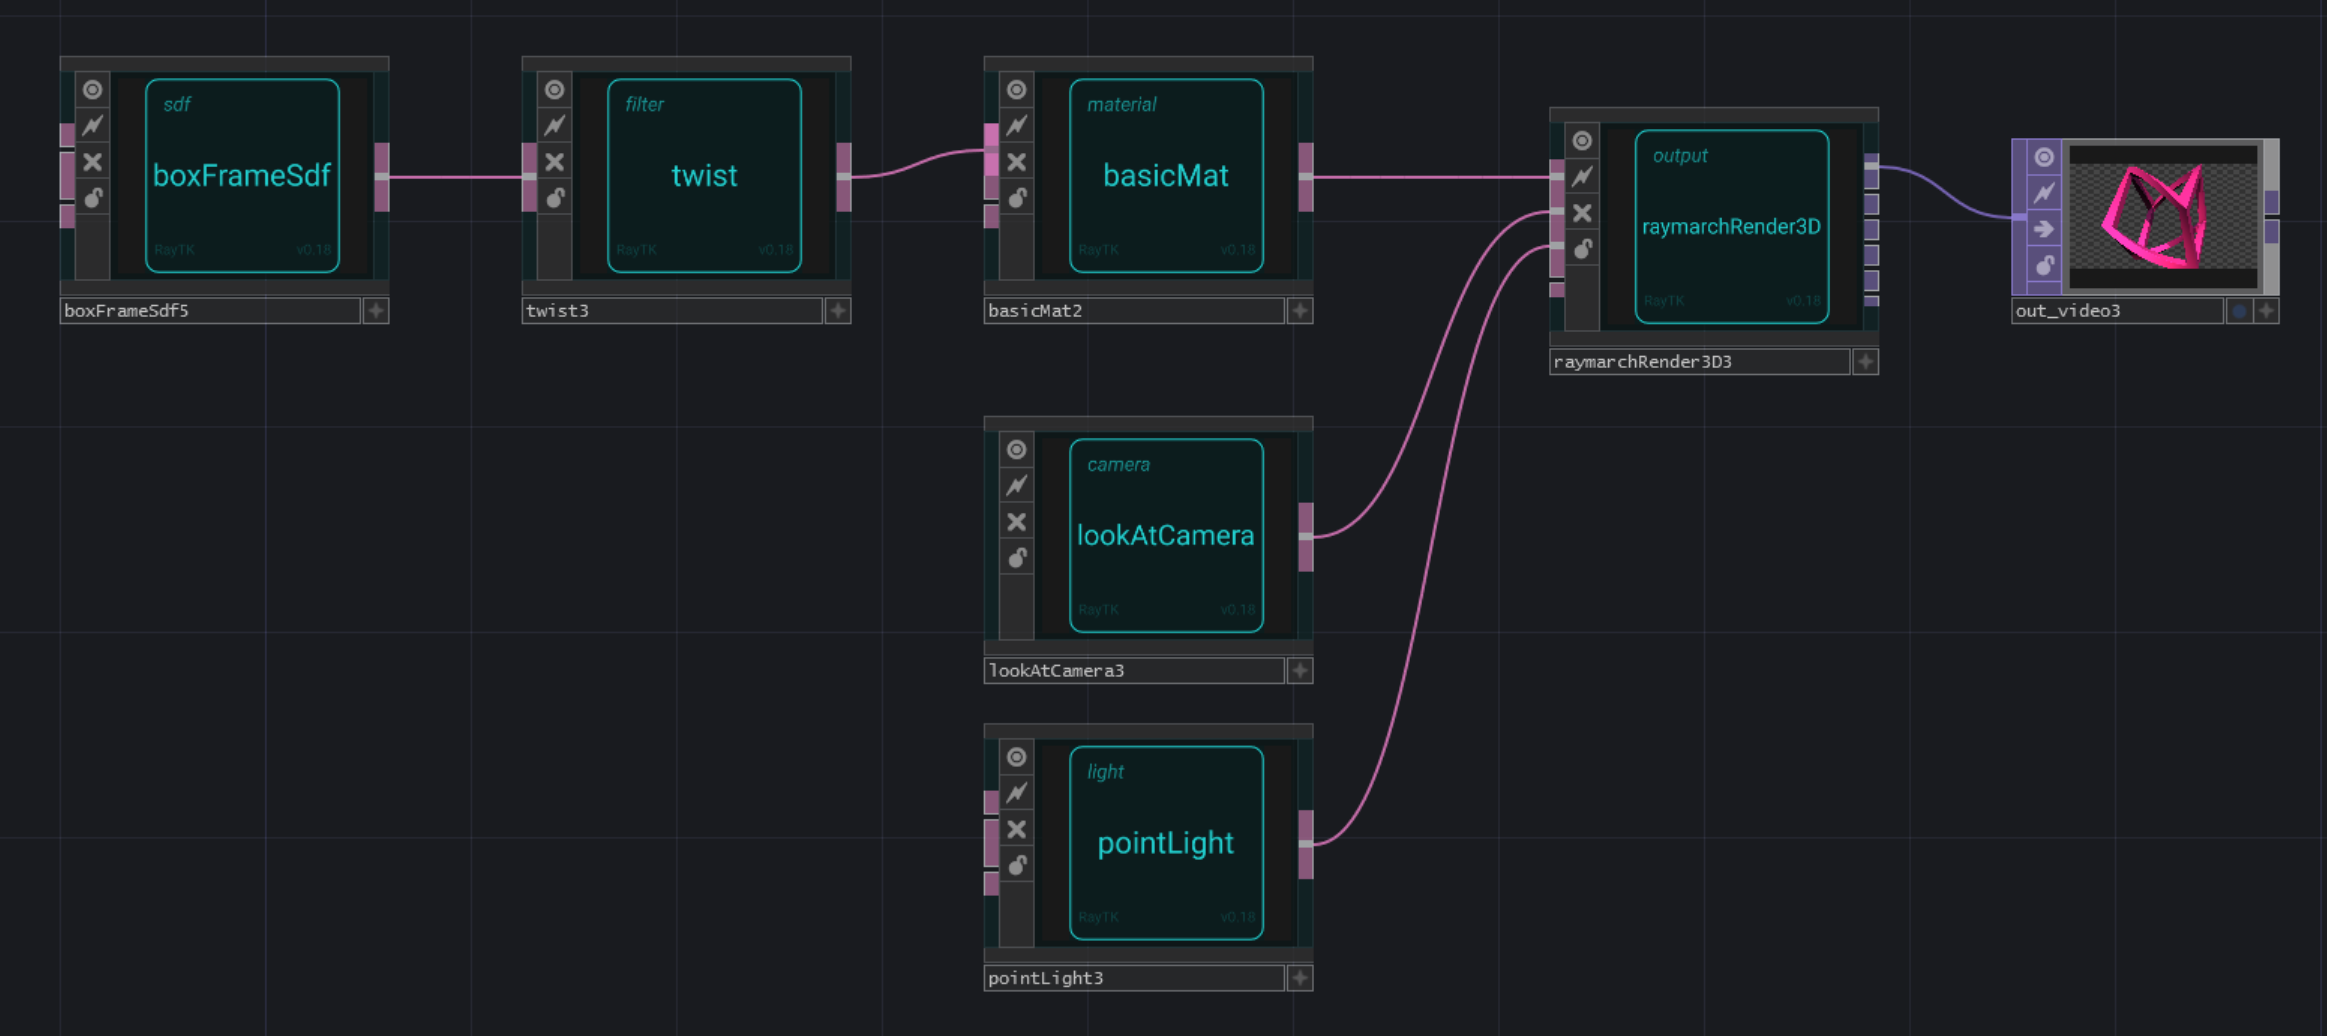
You’ve just created your first “material” ROP. It assigns a material to an SDF, which is used to determine what colors it should use.
Cleanup
Now that you’ve set up your scene, you don’t need to keep the main toolkit tox loaded in the project if you don’t want to.
All the ROPs are totally self-contained! That means that if you save out scenes as tox files, you can drop those into any project and they’ll work, without having to load the toolkit itself.
However some editing tools such as the Palette and the Inspector are only available if the toolkit itself is loaded